Finger movements
Writing with a regular pen is an autopilot setting for most. You pick up the pen and don’t think about which muscles are actually moving it. If you focus on how handwriting differs from brush lettering you’ll notice one big difference, finger vs. whole-arm movements. Regular handwriting involves a lot of finger movements and sliding your hand across the paper from left to right as you’re writing. Doing this for brush lettering will limit your stroke length, cause uneven upstrokes and put extra strain on your fingers.
Whole-arm movements
By not only using your fingers you’ll be able to write longer as your hand won’t get tired and your transitions and curves will be smoother.
How to do it… Make sure you’re holding your brush pen at an angle (see this post on how to hold the brush pen). Rest the side of your hand on the paper with the little finger also touching the paper. Imagine an invisible straight line going through your hand and your forearm, locking them together. You want your wrist to bend as little as possible. Let the movement come from the shoulder and the forearm. You want your arm (while holding the wrist and forearm in a straight line) to move up and down, back and forth on the paper as you create the letters.
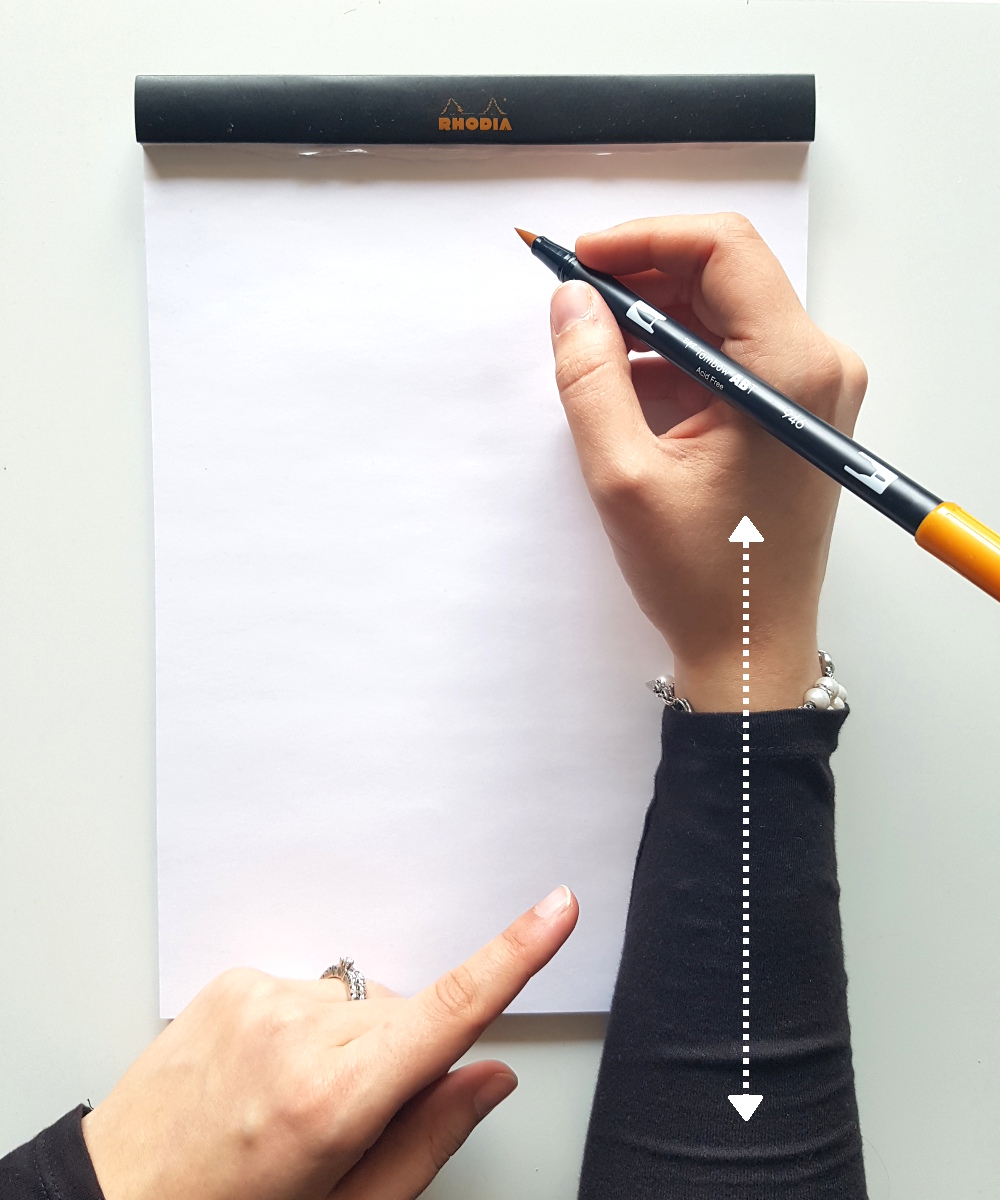
The stroke where you’ll feel the most difference as a beginner is the full pressure stroke. Try it out! Make a full pressure down stroke with a brush pen using your whole arm and then do it with your fingers. Imagine your holding a regular pen, bend your wrist and place the hand on paper without moving your arm. Pull with your fingers down. The fingers tend to pull towards the bent wrist, in a curve. This can make it hard to keep your full pressure downstroke straight. Now, do the whole arm-movement again. Pull with your arm towards yourself. You can make a longer and straighter stroke.
See the video below from my Instagram as a quick demo.
It might feel awkward the first time you try to use your forearm muscles and shoulder to write instead of your fingers, but with practice you’ll notice the amount of control and smoothness in your brush lettering improves.
Tip
If you have large or medium sized brush pens, practice whole-arm movements with them. It will be difficult to distinguish the tiny finger movements with a small tip brush pen (such as the fudes). Or grab a pencil and a sheet of paper and write out mega sized letters using this technique.
Remember
- Regular handwriting involves finger movements and brush lettering involves whole-arm movements.
- Make sure your wrist follows your forearm in a straight line, allow your shoulder to move your arm up and down and sideways.
- Practice with a pencil by drawing BIG letters with your arm. You can also practice with large sized brush pens.
So tell me, what type of movements do you use for your lettering? Did you try the tip? Let me know in the comments below and if you have any other questions or need anything clarified, I’m more than happy to help. Talk to you soon!
Great tips!!!
Thanks! Hope it helped you
Rim
Really great tips! Will definitely give it a try as I tend to use my fingers and wrist when writing 🙂
Tack så mycket Sandra! Let me know how it works out for you using your arm 😉
Rim
Thanks for this article! I’ve been searching around for something just like this as I knew that my writing was too shaky and that the way I was holding my arm was part of the problem. I’ll give it a go tonight!
You’re welcome Linda! It will feel awkward at first but every new hold does. Good luck, hope it helps ?
Rim